Testing and Inspection Equipment and Services 14941
June 15, 2004
Originally Published MPMNJune 2004
SPOTLIGHT
Testing and Inspection Equipment and Services
Expansion-force gauge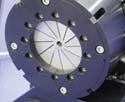
A segmental-compression mechanism controlled by a microstepping linear actuator is at the core of a radial expansion-force gauge. The RX500 model is designed to measure the hoop force of both balloon- and self-expanding stent and stent graft products during expansion and compression. FDA requires some form of a hoop-force test prior to approval to ensure that the stent product provides enough outward force. If the product lacks force, the stent may slip within the vessel, provide a path forleakage, or collapse under the pressure of the vessel. Machine Solutions Inc.,Flagstaff, AZ www.machinesolutions.org
Dovetail slide
Slide assemblies are employed in testing and inspection fixtures, specifically for research and manufacturing gauging. The line of graduated-knob Unislide products feature dovetail slides with an accurate leadscrew and error of less than 0.0015 in. per 12 in. An engraved hand knob measures travel distance and position with a resolution of 0.001 in. The components are available in five cross-sectional widths of 1.5, 2.5, 4, 6, and 9 in. Slide travels range from 1.5 to 84 in. in 3-in. increments. English leadscrew pitches are 5, 10, 20, and 40 threads per inch., and metric pitches are 1 and 2 mm.Velmex Inc., Bloomfield, NY www.velmex.com
Adhesion-measuring equipment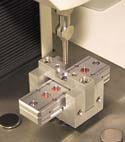
With 0.02% full-scale accuracy, a tester provides precise measurement of adhesion, tack, quick stick, and cohesion. The Lab Master probe tack tester measures force to 0.1-g resolution. Thousands of data points per test are used to generate force and distance curves that reveal material behavior during the test. Applications include adhesives, tapes, pressure-sensitive labels, glue, coatings, and seals. Users can select the contact pressure, position, separation rate, and test duration. With test results displayed as numbers and curves, the machinery can be configured for R&D analysis or one-touch automated process control. The tester's dimensions measure 535 ¥ 490 ¥ 880 mm.Testing Machines Inc., Ronkonkoma, NY www.testingmachines.com
Saline testing application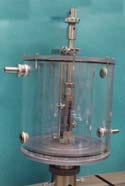
A provider of testing equipment offers a system designed for materials that may be used within the human body. The system, comprising a bath vessel, screw action grips, and platens, tests skin tissue and other materials in a saline solution at body temperature to simulate internal body conditions. The bath vessel is designed with 3¼16-in.-thick Pyrex and acrylic double walls with 4- and 6-in. outer diameters, which provide thermal conductivity and thermal insulation, respectively. The translucent walls enable viewing of the specimen during testing. Screwside-action grips enable easy specimen loading and minimize damage or distortion. Both the grip assembly and platens are constructed from nonferrous materials so that they can be usedin the saline vessel without rusting. Instron, Canton, MA www.instron.com
Torque testers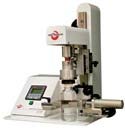
A line of cap tighteners and torque testers is designed for capping, precision assembly, and small production runs of vials and bottles. The ST-Lab products offer a low-profile design and a stable platform for the lab, production floor, or a rolling cart. The components can also be modified to handle medical devices, luers, destructive tests, and fatigue testing. Suitable for batch processing, laboratory production, or quality assurance analysis, the precision heads can be mounted on robotic platforms or conveyors.Sure Torque Inc., Sarasota, FL www.suretorque.com
Materials testing
Product development, nonroutine problem solving, and components or materials testing and analysis are among a company's device-testing capabilities. The service includes compositional stability and extractable and leachable analyses, which can be part of a qualitative or quantitative study of metals, organics, inorganics, or polymers. Other challenges addressed include stability and integrity issues, heavy-metal analysis for patient-contact areas of surgical devices, and identification and quantification of implant and device extractables. The company also offers forced degradation studies for polymeric implants and competitive product analysis.Chemir Analytical Services, St. Louis, MO www.chemir.com
Vision sensor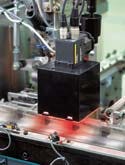
An inspection system combines dual cameras and high-speed processing of 5000 items per minute. The F160 vision sensor incorporates variable-box measurement for area and defect inspection, ensuring that the optimum measurement regions are always used. This area can be set to change automatically when inspecting objects with varying sizes, such as surface-mount components. The product's functionality falls in the midrange of machine vision, between low-end vision sensors and high-end PC-based systems.Omron Electronics, Schaumburg, IL www.packaging.omron.com
Laser microscope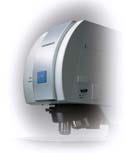
The differential contrast mode on a laser microscope highlights subtle textural variations during the analysis of medical device surface treatments. The Lext laser scanning microscope is designed for submicron imaging with a 0.12-µm resolution and accurate 3-D measurement capability. The magnification power ranges from 120 to 14,4003
to accommodate researchers working between the limits of conventional optical and scanning electron microscopes. Microscopy techniques includebright field and dark field in both video and laser confocal imaging modes. Olympus Industrial AmericaInc., Orangeburg, NY www.olympusmicroimaging.com
Force gauges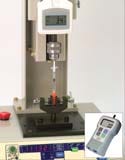
Featuring a 100-Hz update rate, a series of force gauges capture high force peaks when testing sutures, puncture and blister packs, needle sharpness, medical tubing, and connections. The Dart and Javelin products offer flip displays, permitting the user to read the gauge right-side up. The products also allow users to select a display update rate of from 1 to 20 times per second. Peak compression and peak tension are displayed in real time. The all-metal construction of the Dart model permits accurate measurement of compression and tension forces up to 100 lb, while the Javelin handles 200 and 500 lb.Nidec-Shimpo America Corp., Itasca, IL www.shimpoinst.com
Precision test stands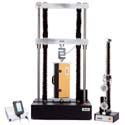
Suitable for quality control testing, a series of ball screw-driven stands can perform compression and tensile tests without special adapters or cages. The 700-series universal test systems feature sturdy ball screw drives for smooth operation and precise crosshead positioning. The 500-lb model has a single-screw drive while all other models are twin screw. In addition to offering a choice of speed ranges, the products support a range of load-cell capacities.
Com-Ten Industries, Pinellas Park, FL www.com-ten.com
Copyright ©2004 Medical Product Manufacturing News
You May Also Like

.png?width=300&auto=webp&quality=80&disable=upscale)
