January 14, 2009
Originally Published MPMN January/February 2009
BREAKTHROUGHS
Ultrasonic System Performs Nondestructive Nitinol Measurements
|
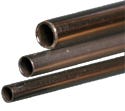
In conjunction with a laser scanning micrometer, UltraGauge+ provides data on the ID, OD, and wall thickness of medical-grade tubing. |
Nitinol is playing an increasingly prominent role in the manufacture of medical-grade tubing. However, because of its unique crystalline structure, the material has been difficult to measure accurately. With its UltraGauge+ ultrasonic system, LaserLinc Inc. hopes to remedy this problem. The company claims that its system is the first practical in-process method for performing nondestructive ultrasonic measurements on nitinol tubing.
The traditional method for measuring material thickness involves measuring the time that elapses between a signal reflected from the outer wall of a material and a signal reflected from the inner wall. But nitinol’s crystalline structure “causes it to yield inconsistent and unreliable results [when it is measured] using traditional ultrasonic wall-thickness measurement techniques,” notes Robert Wexler, LaserLinc’s communications director.
To overcome this obstacle, LaserLinc discovered a measurable characteristic that directly correlates with nitinol thickness and produces repeatable results. Based on a previous-generation ultrasonic measurement tool pioneered by Hudson, MA–based On Line Controls, the UltraGauge+ is equipped with a digital signal processor that can accommodate up to eight ultrasonic transducers, enabling continuous in-process inspection of tubes, hoses, and other products. In conjunction with a laser scanning micrometer, UltraGauge+ provides data on the inside diameter (ID), outside diameter (OD), and wall thickness of medical-grade tubing.
Medical products are manufactured under tight specifications, remarks Wexler. “Slight variations in any of these aspects can cause the entire production run to be scrapped. Measuring the ID, OD, and wall thickness [of tubing] during production enables manufacturers to monitor as they go and identify problems as they occur, which minimizes scrap and downtime.”
Along with UltraGauge+, the company offers the UltraLock wave-analysis procedure, which simplifies ultrasonic measurement system setup. A component feature of the company’s Total Vu software, UltraLock reduces ultrasonic measurements to one step, automatically sets software parameters to ensure accurate measurements even if the size of the product changes during a production run, and configures the system to measure all the layers of multilayer products.
Manufacturers of medical-grade tubing made from plastic, glass, or metals such as nitinol may benefit from the ultrasonic measurement technique, according to Wexler. Applications include guidewires, stents, and catheters.
LaserLinc Inc., Fairborn, OH
www.laserlinc.com
Copyright ©2009 Medical Product Manufacturing News
You May Also Like


.png?width=300&auto=webp&quality=80&disable=upscale)
