
Sign up for the QMED & MD+DI Daily newsletter.
Five Prototyping Tips to Reduce Cost and Time to Market
Efficient strategies bring design concepts to life.
Daniel Santos
September 14, 2012
13 Min Read

There’s a common phrase, “A picture is worth a thousand words.” But when it comes to understanding a medical device concept, a prototype is worth a million—at least according to customers and end users of the device.
Top Prototyping Tips1. Observe and understand real-world application.
|
Having a physical model made from 3-D CAD data has become common—and expected—in the medical device industry. Instead of basing product discussions on a designer’s drawing, customers and end users want to be able to see, feel, and interact with a prototype.
As Dan Saffer, author of Designing for Interaction explains,"Many clients will have difficulty understanding a design until they see and use the prototype. Like all the other models and diagrams, it is a tool for communicating. Prototypes communicate the message, 'this is what it could be like'."1
Prototypes help guide more productive conversations about whether or not the design is correct and will function as it was intended. If modifications to the design need to be made, prototypes help the designer evaluate solutions and verify that the changes meet customer expectations. As a result, less iterations are needed to take the design from concept to creation and delivery.
Although prototyping CAD designs has evolved into standard practice for most medical device designers and engineers (thanks in part to more affordable prototyping technology), it doesn’t mean that their process is as efficient as it could be. To help ensure that your prototyping process meets your customer expectations, delivers a manufacturable design, and is as productive and cost-effective as possible, consider the five tips detailed in this article.
1. Observe and Understand the Real-world Application
Most outsourced designers and manufacturers of medical devices sell their products to OEMs, who then sell to a distributor or end user. In these situations, the OEM customer explains the device’s application to the designer or engineer. While their specifications may inform the designer of what the focus of the prototype should be and what the objectives are, it excludes many idiosyncrasies of the real-world application.
To help bridge the gap between the design and the device end user, it can be incredibly valuable for the designer or engineer to spend time in the operating room, labs, and clinics to see first-hand how the device is used in the field.
For example, a design engineer may learn that when doctors in the field are finished using the device, they routinely hand it to a nurse or surgical technician, who rinses it with water, scrubs it with a brush, dips it into a cleaning chemical, and then puts it into the autoclave.
Seeing first-hand the harsh cleaning process that this device is exposed to enables the design engineer to give more consideration to the device’s components, such as sealants, materials, buttons, and cables. It also helps engineers create more rigorous test protocols so the device’s safety and reliability can be accurately verified and validated. Without this knowledge, it’s likely that many important parameters related to the device’s operation and handling will be overlooked in the testing process.
The ability to see how the device is used, hear how it sounds during application, and experience how different variables interact better prepares the designer to build a more realistic prototype that meets the customer’s requirements and accommodates the end user.
The designer might even identify a unique feature that is unfamiliar to the customer, but incredibly beneficial to the end user. Integrating the feature into the prototype gives the designer the opportunity to analyze simulations to determine how the feature will enhance user experience; verify that the feature will support efficient manufacturing; and explain and demonstrate their findings to the customer early in the process while it’s still cost-effective to do so.
2. Design for Manufacturing/Design for Assembly
Design for Manufacturing (DFM). DFM is the process of designing (and prototyping) products with careful consideration to their manufacturability. The goal is to ensure a smooth transition from design to full-scale production and prevent potential manufacturing issues as early and promptly as possible.
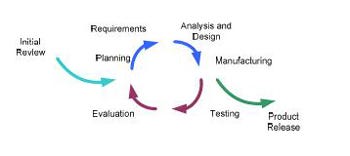
|
Figure 1. Concurrent collaboration between all disciplines. |
To help ensure that everyone involved in the project is on the same page regarding the customer’s design and manufacturing requirements, DFM brings together multidisciplinary teams (e.g. design, engineering, RA/QA, manufacturing, procurement, sales, and business development) at the very beginning of the project (see Figure 1). This collaborative approach supports consistent communication throughout the entire process so that potential manufacturing issues are prevented early on.
Each of these disciplines has its own needs and concerns related to the design and manufacturing of the product. For example, engineering will be looking at material types, tolerancing, and part requirements. Manufacturing needs an understanding of tooling, setups, and required programming. The procurement team is concerned with the materials needed and the availability of them. RA/QA is interested in elements that could affect the final product, its classification, and registration.
Early collaboration of multidisciplinary teams makes it easier to look at the process holistically—from project feasibility, proof of concept, design, and development, to verification and validation, manufacturing, and market release. This method is especially helpful for devices that pose unique challenges, such as electromechanical devices that require custom components. Custom components, like motors and cables, tend to have long lead times, which can stall a project while it’s in the prototyping stage.
DFM helps uncover these issues early—even before the design is created—and enables the team members to prevent unnecessary steps, set-ups, material changes, and restarts. For example, instead of waiting weeks for a custom motor to arrive, the crossfunctional team might determine that a readily available off-the-shelf motor will suffice for a prototype demonstration. Even though the size or length of the off-the-shelf motor might not be exactly the same as the custom motor, its torque and speed provides a time and cost-savings solution that enables a design engineer to show the customer what they will need in terms of performance.
Design for Assembly (DFA). Without careful consideration of the assembly process during the prototyping stage, it’s likely that manufacturing will be more difficult, timely, and expensive than necessary. For example, thorough examination of a prototype may reveal that flats need to be added to the design to accommodate a torque requirement during assembly. The design engineer can quickly and easily incorporate the design modification, make a new prototype with the necessary fixture, and show it to the customer for approval—well before the design is released to manufacturing.
Alternatively, if a design is released to manufacturing and it’s later discovered that additional features are needed, the whole process gets interrupted. The engineer has to go back, revise the drawing, make deviations and redlines, update routers and bill of materials, and take extra steps that extend time to market.
A prototype can also expose ways to simplify the design so that the number of parts required can be reduced. Fewer parts make it easier to assemble the device and decrease the likelihood of a defective part holding up the production process.
In addition, costs related to fabricating and assembling the product, along with costs to purchase, stock, and service such parts are lowered as the number of parts is scaled down. When specialty parts are used unnecessarily, extra processing and/or more complex tooling is required, hindering production volumes.
3. Collaborate with Machinists
When it comes to prototyping, the machinists are a design engineer’s greatest ally.
In the early stages of creating a CAD drawing and making a prototype, the design engineer’s focus is mainly on incorporating the functionality, materials, torque requirements, and other product specifications provided by the customer. However, they may inadvertently include features in their design that make it costly and time-consuming to manufacture.
Because the machinists have extensive knowledge of the machines on the manufacturing floor and what the machines’ capabilities are, they can offer invaluable feedback about the manufacturability of the design. In addition, the machinist’s familiarity with tooling, production machines, and assembly makes them an essential resource for suggestions on how to modify the design to accommodate manufacturing capabilities while still meeting the customer’s requirements.
Without input from a knowledgeable machinist, the benefits of prototyping fall short. The design engineer is likely to release an efficient design to manufacturing that might be impossible to produce in-house. If production has to be halted so the part can be machined by a third-party vendor or the design needs to be modified late in the process, it’s much more difficult to keep the project on time, on budget, and on scope.
The more productive path to prototyping is for the designer/engineer and the machinist/prototyping department to openly discuss potential issues at the very beginning of the project and collaborate to resolve them.
For example, some helpful questions for a designer/engineer to ask the machinist(s) include the following:
Can the prototype be secured properly during manufacturing and assembly?
Does the prototype contain any features that will be difficult or impossible to manufacture using current in-house processes?
Does the prototype require certain parts to be injection molded?
Can the prototype be manufactured completely on in-house CNC machines?
Can the prototype be machined in the in-house machine shop?
Is the product designed for high-volume manufacturing?
The machinist’s feedback and expertise should also be communicated so the customer can better understand why certain revisions are suggested and how they can improve the manufacturability of the design.
4. Use Prototyping Technology Productively
Over the years, prototyping technology has gotten relatively less expensive. Printers that can make 3-D solid plastic objects from a digital model (3-D printers) and machines that employ a high-powered fiber-optic laser to create a nearly complete, complex metal part in hours without any tooling (direct laser metal sintering) are increasingly making their way into many medical device design and manufacturing companies.
The ability to prototype in-house makes it faster, easier, and less costly for medical device designers and engineers to communicate their design intent to the customer. By being able to see what the design specifications produced and feel the device in their hands, both the customer and designer can more accurately evaluate whether or not the design is on track. And if changes need to be made, modifications can be incorporated and tested for fit, form, and function in hours instead of weeks.
However, just because a prototype machine helps reduce the number of iterations needed to meet customer requirements doesn’t mean that fewer prototypes should be made. A common misjudgment is printing only one 3-D model of the design to show to the customer, incorporating revisions in the CAD drawing, and approving it. Instead of relying on one prototype to serve as the model for all design refinements, an important step is to print a physical prototype after each design iteration for the customer to review and approve.
Another oversight made by some design engineers is that they don’t show the prototype to the machinists or solicit their feedback. Instead of printing off the part and showing it to the customer, a more productive, value-added approach would be to give the machinist time to examine it first. When given the opportunity to hold the prototype in their hands and assess it for tooling or fixturing needs, they can help avoid potential problems that might delay the project and add cost.
5. Run Preproduction
Once a prototype has been made and approved by the customer, the device can move on to the next stage of the manufacturing process. For some organizations, this next phase is full production. However, an often overlooked step ispreproduction. In preproduction the exact same machines, systems, programs, routers, fixtures, inspection gages, materials, and tools are used as in full production—but only small batches of 10–20 units are run through the process.
The knowledge gained from preproduction bridges the gap between prototyping and manufacturing, and streamlines the production process. For example, if there’s a feature that requires a unique drill size to create a distinct hole in the device, a preproduction run might reveal that a slight update to the design will allow a standard drill to be used instead a custom tool or fixture. Learning about this issue before the device moves into to full production grants the design engineer time to make the design modification, inform the customer of the change, and receive approval while the device is still in the development stage.
Just as the customer benefits from being able to see and hold a physical model of their design specifications, so does the manufacturing team. Having physical parts to feel and interact with makes it easier to evaluate the prototype for size/weight, ergonomics, fit, and features. In addition, preproduction fosters productive, solution-oriented conversations between manufacturing and engineering about design limitations, materials, features, components, and other factors that affect efficient production.
The Promise of Prototyping
As prototyping techniques and technology have improved and become more affordable, the time between drafting a design and having actual parts made has compressed. Designers and engineers have more opportunities to determine how to best fixture a part, choose what materials need to be used, evaluate ergonomics, and assess where challenges may arise—all while still early in the development process.
While prototyping contributes to accelerating time to market and cost reduction, prototypes, by themselves, do not ensure that a design will efficiently and cost effectively meet the customer’s requirements. Truly productive prototyping requires the design team to consistently collaborate with the customer and the manufacturing team throughout the entire process. This approach to prototyping is what will produce a device that offers maximum benefits to the end user and strengthens the customer’s competitive advantage.
Reference
D Saffer, Designing for Interaction, (Berkeley, CA: New Riders Press, 2009).
| Daniel Santos is engineering manager at Pro-Dex Inc. (Irvine, CA). Reach him at [email protected]. |
About the Author(s)
You May Also Like
.png?width=300&auto=webp&quality=80&disable=upscale)