PROFILE: Better Vision System Boosts Inhaler Box Output
March 10, 2001
Originally Published MPMN March 2001
PROFILE: Better Vision System Boosts Inhaler Box Output
With a new pair of eyes watching a once-troublesome production process, an inhaler maker is getting more accurate inspections and fewer false rejects.
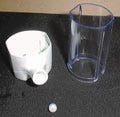
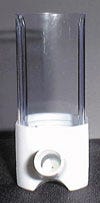
At the U.S. facility of Bespak plc, a UK-based manufacturer of drug-delivery devices, a machine vision system measures the dimensions of orifices in injection-molded plastic inserts that are assembled into inhaler boxes. To meet customer specifications, the vision system is supposed to reject orifices that don't fall within a ±0.002-in.-diam tolerance. The system also checks to make sure that the orifices are no more than 20% oval (i.e., that there is no more than a 20% difference between any two diametric measurements of the same orifice).
|
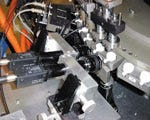
| Automated assembly of the inhalers is performed at the Bespak facility in Apex, NC. |
But Bespak's eight-year-old vision system wasn't up to the job. The system couldn't pass the most basic validation tests or meet the company's repeatability and reliability testing requirements. "Our internal requirement was no more than 20% variability in performance, and our ultimate goal was to achieve less than 10%," explains Jim Gallion, manager of manufacturing engineering at Bespak's facility, located in Apex, NC. "With that system we were struggling to get below 30–40% variability, which was leading to an excessive amount of falsely rejected products."
A Better Alternative Gallion and his colleagues investigated other alternatives. After evaluating several products, they settled on a Checkpoint 900 vision system from Cognex Corp. (Natick, MA). The vision system includes a Pentium-equipped computer with a Checkpoint 900 PC plug-in card, two Sony CCD cameras, and a remote-controlled Fostec fiber-optic light source. In Bespak's plant, inhalers are assembled by an automated machine. The machine takes inserts from feeder bowls and places them two at a time on a rotary indexing table. The table indexes the parts into the view of the two vision cameras, which are mounted side by side. Motion stops while each camera captures an image of the part in its line of view. Extreme magnification is necessary to get high-quality images of the tiny orifices, which measure approximately 0.02 in. diam. Extreme magnification is required to capture images of the 0.02-in.-diam orifices in the inhaler box inserts.
Image data goes to the Checkpoint card, which uses PatMax geometric pattern matching software to determine the exact position of the orifices. This is no easy task, due in part to the size of the orifices and in part to machine vibration. "Even slight vibration can shake the field of view and cause the pattern's position to vary," explains Joe Grove, a Bespak manufacturing engineer. But with its rapid-reset CCD cameras and high-speed processor, the vision system can capture high-resolution images of a vibrating target, Grove reports.
When the system receives an image, it checks the orifice diameter using Checkpoint's Edge and Arc Gauge tools. These tools acquire 72 radial points, which are used to calculate an average diameter. The system also uses the radial points to determine whether the shape of the orifice meets the oval-shape specifications. The entire inspection process takes less than a second.
Light Concerns During inspection, the Fostec light illuminates the orifice from the inside. If light intensity diminishes, "the vision system is not able to detect the crisp, well-defined edge of the orifice, which affects the accuracy and reliability of the results," Grove says. To maintain adequate light intensity, Grove came up with a data-carrying loop. A key component of the loop is Checkpoint's Light Meter tool, which assigns a "light value" to each image the system captures. This value is transferred from Checkpoint software to Visual Basic through bridging software called Checkpoint Communication, or CPComm. The transfer is necessary because, unlike the Checkpoint software, Visual Basic can be used to communicate with the Fostec light. If the light value is too low, the system sends a Visual Basic message to the light source to boost intensity. Then the light meter checks the intensity again. If it's still too low, another Visual Basic message is dispatched to the light. The process is repeated until the proper intensity level is reached. "This is a pretty high-level feedback loop that solves the major problem with vision, which is lighting variation," Gallion says. When the vision system spots a defect, it's logged in a database. Defective parts are dropped in a reject bin. Parts that pass inspection are placed on an offload conveyor, which carries them to a packaging station. During the inspection process, a special graphical user interface appears on a 17-in. monitor built into the assembly machine. Developed by Bespak engineers, the interface displays the parts being inspected and keeps a running tally of the number of rejects. By hiding Checkpoint's more complex features, the interface makes it easier for plant personnel to operate, test, and calibrate the system. Passing the Test Since it was installed and validated last year, the new vision system has been inspecting more than 20,000 inserts a day. "The Checkpoint system [has] proved capable of measuring the inserts within strict tolerances," Gallion reports. "And it passed the original validation tests and many others with flying colors." The machine vision system inspects more than 20,000 inserts daily. According to Bespak, the system has been very reliable, producing fewer false rejects and less scrap than its predecessor. The system has also reduced variability to well below Bespak's target of 10%. Even with tighter-than-normal tolerances, variability now ranges between 3 and 4%. According to Gallion, variability that low "is completely unheard of for automatic vision inspection at these speeds." Encouraged by this experience, Bespak has much bigger plans for the Checkpoint vision system. "We will use this everywhere," says Gallion, adding that his company plans to use vision data to make process adjustments that will prevent the manufacture of faulty parts. "This is where we see the world going."William Leventon Copyright ©2001 Medical Product Manufacturing News
You May Also Like


