Sign up for the QMED & MD+DI Daily newsletter.
Bill Evans
September 1, 1996
21 Min Read
.svg?width=850&auto=webp&quality=95&format=jpg&disable=upscale "SPEEDING PRODUCT DESIGN THROUGHRAPID PROTOTYPING")
Bill Evans
For technology companies in the highly regulated medical environment, making the transition from product concept to production as fast as possible is critical. The more planning that goes into the early stages of product development, the greater the chances of lessening the time, errors, and costs related to a project. This article, written from the perspective of an engineer trying to decide which rapid prototyping technique is most appropriate for a given problem, should serve as a guide for engineers at the beginning of a project. It will enable them to intelligently plan the use of the numerous, and quickly evolving, rapid prototyping techniques and direct data transfer methods--from making early breadboards through to beta production.
Before committing a design to expensive and time-consuming physical models, design engineers may want to consider some of the recently developed "virtual product" techniques.
Multimedia Interactive Product Demos. A multimedia interactive product demo is a relatively new technique that allows users to test drive products before committing their hardware and software development dollars. These demos usually consist of a computer screen mock-up of the control panel and possibly an animation of what the operator may see during the procedure. The user then navigates through the demo using a mouse. Animations, changes to display information, and audio feedback help give the user a more-realistic product experience. With this technique, even subtle and sophisticated operating scenarios can be simulated to help clients make the conceptual leap from a written product description to the feel of a virtual product demonstration.
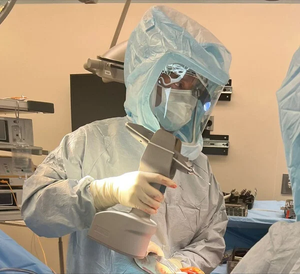
These kinds of demos are especially useful for products, such as surgical and diagnostic equipment, with significant user interface issues. They work well in the tightly regulated medical marketplace because they allow changes to be easily made in the early stages of development. They can also become highly refined as the design develops, and may sometimes be used as a supplement to medical equipment training videos. These demos can also be used as part of a comprehensive user-testing program if specific safety issues or user-error tolerance issues need to be addressed.
The relatively low cost and time requirements of multimedia interactive demos are big pluses for this technique. Creating a demo can take from as little as one-tenth to one-half the time of doing a traditional hardware and software mock-up, with a similar reduction in cost. And compared to more-conventional prototypes, a demo is highly portable (when a color laptop computer is used). Additionally, it forces designers to create a kind of story board early in the process, which requires using another level of critical thinking.
The multimedia demo technique gives the designer, engineer, or potential customer a more visceral feel for how a product will behave. However, because the demo is not the real thing, conducting reality checks with certain aspects of the design is recommended--especially when it comes to human ergonomic issues such as a display's readability at low light levels. Similarly, the tactile feel of a product cannot be reproduced on a computer. If an important part of the design involves rotary controls and push buttons, it may be necessary to find examples of real controls and base product specifications on them.
Another advantage of a multimedia interactive product demo is that it can help catch mistakes by being put into the hands of many people, including potential users, salespeople, and the like. It encourages viewers to analyze and constructively criticize the interface design rather than simply consider it a finished product just because it looks that way on the computer screen. An added benefit of using these demos to refine user interfacing is that the final interactive model becomes a very tight specification for software and electrical engineers--much better than a traditional written description.
When to use this technique: Multimedia should be used when there is complex user interaction with a product and when there is a need to quickly prototype and test the ideas with real users. (For example, this may be the case with surgical lasers, surgical instrument electronic controllers, and any complex diagnostic equipment.)
A few design firms include this specialty in their skills. Check around and ask for demo examples, but beware of designers who use these tools for creating software interfaces. Instead, try to find a design firm with product, rather than software, experience.
Computer-Aided Industrial Design (CAID) Rendering. The CAID rendering process involves using software to create a product as a 3-D model and then planting it in an imaginary setting using a variety of photorealistic rendering packages (well-known packages include Alias and CDRS, among others). The quality of such images is common knowledge, since they are used extensively in visual effects for Hollywood films.
The main advantage of CAID is that engineers can obtain good criticism of a product before committing to a physical model of the design. And since CAID rendering minimizes the conceptual leap that must be made with traditional product sketches, it can be a powerful tool for engineers and designers to communicate ideas to upper management, and useful with early-stage product focus groups.
The speed--weeks less than that of traditional methods of making and photographing models--and relatively low cost associated with this technique are additional advantages of using CAID rendering for product walk-throughs. Costs will vary, but a good rule of thumb is that CAID costs for smaller objects will be similar to those of models and photography, whereas CAID cost and time requirements for larger products will likely amount to only a fraction of those related to model-made equivalents.
However, the very strength of CAID rendering can also become its weakness. The polished look of CAID images can inadvertently discourage criticism of a product. Engineers may be lulled into a false sense of reality by eye-catching CAID images. Similarly, upper management could be led to believe that the product is further advanced than it actually is and thus hold back full criticism.
CAID rendering also has drawbacks when it comes to ergonomic issues. For instance, it is unwise to conduct early studies of intimate handheld products using this technique--a quick handmade foam model may be a better choice. On the other hand, CAID may be good for larger products, such as racked instruments or relatively static product housings that have to look good but aren't physically handled every day.
Another issue to be aware of is that some CAID packages do not accurately handle underlying numerical details, such as internal component sizes. So if accuracy of underlying data is really important for a particular project, be sure the CAID program is good at this particular function.
When to use this technique: CAID rendering can be used as a powerful presentation tool for product concepts that do not involve intimate ergonomic contact (for example, large diagnostic equipment or any product that is predominantly a "box"). If computer-aided design (CAD) compatibility is important, your CAD vendor will likely know firms that can offer this service to suit your CAD.
There is now a vast array of rapid prototyping techniques available for physical prototypes. The most common are explained here. If some are unfamiliar or appear useful, request samples from vendors or keep an eye out for them at trade show exhibits and presentations.
Stereolithography (SL). This prototype technique most closely resembles magic in the product design world. With this method, a floppy disk or E-mail data file is sent to a vendor. Based on that information, layers are built up in a resin bath to create a faithful reproduction of the specified product.
Two advantages of this technique are that data do not have to be handled by a machinist operator who could potentially make errors of interpretation, and that with some careful shopping around, one can end up with a prototype at one-third the cost and in about one-third the time of traditional models or machining. (Many vendors can turn STL 3-D CAD files into parts in about one week.) The result is more chances to get it right by doing more model iterations and ultimately ending up with a more mature design, even if it doesn't save money overall.
There are, however, a number of drawbacks to this technique. First, resin is a brittle and thermally unstable material, which means that a model can warp in the trunk of a car on a warm day. In addition, the model is built up in shallow steps--typically 3 to 5 mil--so small details tend to wash out. The hand-finishing can sometimes be poor, so care must be taken in specifying to vendors. And since working from direct data doesn't leave the traditional paper trail of drawings, data must be checked very carefully.
One way to minimize this problem is by taking full advantage of the power of CAD to run interference checks and by driving through the design with engineers before sending out the model. It also helps to freeze a version of the database as a reference. And while SL is low-cost and fast, remember that direct data machining companies are trying to stay competitive on pricing and can produce models in more-durable materials, so it may pay to shop around and weigh the differences for each situation.
When to use this technique: SL should be used on smaller complex parts, usually those intended ultimately for plastic or metal molding manufacturing techniques. Any plastic injection molding, metal die casting, or other part intended to be made in an allied process that will fit in your vendor's machine is a candidate. (SL machines are limited by size; for example, the part must fit in a 6- or 12-in. cube.)
SL vendors such as Scicon Technology (Valencia, CA) can be found in the prototyping services listing in the phone book or by contacting a CAD vendor for recommendations. Manufacturers such as 3-D Systems, Inc. (Valencia, CA), will also make referrals to local service bureaus that have bought their machines.
Solid Ground Curing. Solid ground curing is a relatively new variation on SL. It currently offers a price point and delivery similar to SL, but with a slightly stronger and more thermally stable material. Otherwise, it has advantages and disadvantages similar to SL. The process still builds the part up layer by layer, using a photopolymer that is fixed with UV light and then backfilled with wax. Each layer is then milled to the correct thickness before the next one is applied.
Currently, the solid ground curing method used by Cubital America (Troy, MI) has a maximum step resolution (meaning the thickness of each layer as it is built) of about 6 mil, compared to SL, which can go down to 3 mil. On a final note, the quality and strength of prototypes produced by SL and solid ground curing methods change frequently as vendors strive to improve their competitive positions. Consequently, it is important to keep reappraising these techniques for strength and accuracy. Also, remember that it would be difficult to sterilize SL or solid ground curing parts using any process that elevated temperature above 100°F.
When to use this technique: Solid ground curing has constraints similar to those of stereolithography, except it is more appropriate for parts that need to be a little stronger and more resistant to heat and handling. A vendor of solid ground curing equipment should be able to refer you to local service bureaus that have bought its machines.
Selective Laser Sintering (SLS). The SLS technique also builds up a part layer by layer. As the name implies, a 3-D object is created from layers of powder sintered by a powerful CO2 laser. Because it can create parts in thermoplastics strong and thermally stable enough for evaluation in more-realistic conditions, SLS is exciting for medical applications. Both nylon and polycarbonate can be sintered, and the final part will have about 75% of the properties of the normal polymer. The layers are 5 mil thick and, overall, the part can be as accurate as one formed by SL (± 0.005 in.).
These characteristics make the process ideal for complex plastic prototypes that need to be highly functional and made more quickly than by machining. Appearance may be a concern, however, because the sintering process makes the parts look slightly granular. This can be rectified with skilled finishing, but such finishing tends to slow the prototyping process and make it more expensive. The cost and scheduling requirements are similar to those of SL, but as with any of these rapid techniques, one must comparison shop between processes and vendors, because quotes vary significantly.
Casting wax and even metals can also be laser sintered. SLS of a metal mixture of 60% steel and 40% copper is in its infancy; currently, metal parts are used for creating tooling cavities and have less-smooth surfaces that make for poor-looking parts. But keep an eye on this process, because it is likely to improve and add more thermoplastic materials to its capabilities.
When to use this technique: SLS should be used on complex plastic parts that must have functionality close to those made by the intended production technique, which is usually plastic injection molding. Part aesthetics are poor, and engineers should keep in mind that machines are limited in size to 12 in. diam by 15 in. tall. SLS equipment vendors such as DTM Corp. (Austin, TX) may be able to refer you to local service bureaus that have bought their machines.
Other Rapid Prototyping Methods. There are several other processes worth considering that are not yet as commonly used as some of the previously mentioned techniques. These techniques include fused deposition modeling (FDM) and laminated object manufacturing (LOM).
FDM creates a part one layer at a time from a filament of material precisely manipulated in the x and y axes, with each layer being melted to the preceding layer. Possible materials include ABS, including a specially formulated medical grade called MABS, as well as elastomers and investment casting wax. MABS parts can be gamma sterilized. According to Stratasys, Inc. (Eden Prairie, MN), a manufacturer whose systems use the FDM process, parts must fit within a 10 X 10 X 10-in. working envelope and the process will typically provide ±0.005-in. accuracy.
LOM takes low-cost sheet materials like plain or specially impregnated papers and builds them into a solid part suitable for form, fit, and function evaluation or as patterns for casting. This technique is based on the simple idea of a laser cutting each layer, then laminating it to the preceding layer. Large parts can be made to 22 X 32 X 20 in., with accuracy of ±0.010 in.
As is the case with many rapid prototyping techniques, manufacturers of FDM and LOM systems are continually improving both the resolution of their processes and the materials they can process. So keep an eye on these and other techniques, and take notice of samples and demonstrations at industry trade shows.
Direct Data Machining. Frequently used today, direct data machining is accomplished by designing a part in CAD and then sending the CAD data file, rather than traditional drawings, to a vendor for machining. If a company can afford the time and money, it may find that it is better to direct data machine plastic parts rather than using SL or solid ground curing, since the parts are aesthetically cleaner, more accurate and thermally stable, and made from stronger materials. Machining this way can take as little time as SL (about one week), but much depends on part size and complexity as well as your relationship with the vendor.
Many vendors are highly versed in handling direct data with metals. However, there are a number of problems to be aware of when it comes to direct data machining of plastics, which are often needed when making copies of injection moldings or early prototypes of disposables. Many of these challenges revolve around the significant differences in the way plastics behave structurally when they are injection molded versus machined.
When plastics are molded, the polymer chains are well aligned and tend to optimize the strength of the part. But in the direct data machining process, strength and integrity can be lost when the chains are broken as the part gets sculpted from a solid block. Therefore, direct data machined plastics behave quite differently from molded plastics. Pigment and color can also affect the ease of machining--a white sample may machine in a radically different way than a black sample. Of particular importance to the medical market is that some plastics may be highly suitable for sterilizing when molded but, when machined for prototypes, their dimensions and features can change significantly during autoclave, gamma, or EtO sterilization. As a result, companies should test-sterilize small machined samples before committing to expensive prototypes.
When to use this technique: Direct data machining is effective when used to mimic molded parts in the intended production material or to more quickly machine anything that would in the past have been machined from fully dimensioned drawings by more traditional techniques.
Many CNC machining shops are familiar with direct data machining. Although such shops may be biased toward metals, simple fabrications in plastic can also be handled. To mimic more-complex plastic injection moldings, contact specialized model-making service bureaus, like Visual Engineering (Plano, TX), that may be more familiar with the issues. As with any manufacturing process, quality can vary dramatically, so test vendors with smaller simple parts and work up to the tricky challenges.
Combining Machined and SL Parts. To help control the costs of prototyping very large or intricate parts, it is sometimes advantageous to combine SL and machining. SL may be more cost-effective for some intricate details but may not have the mechanical properties needed for features such as slides, snaps, bearing surfaces, and so on. For example, direct data machined plastics can be used to handle the sliding parts, which are then dropped into the main part that has been made by SL.
There may occasionally be a need to combine real molded parts with SL or machined parts to get special part qualities. A good example is that of living hinges, which may be needed in intricate small mechanism parts for medical disposables. To select hinges with the proper dimensions from the myriad low-cost polypropylene containers available, take calipers along when going shopping. Then machine the hinges out to incorporate into the prototype.
Laser Cutting of Light Materials. If used appropriately, laser cutting can revolutionize rapid prototyping. It radically reduces the time and cost of producing innovative ideas, particularly in plastic. For example, the process can create acrylic parts in as little as 24 to 48 hours from 2-D CAD files at a cost of $3 to $4 per piece, whereas it may take one to two weeks at a cost of $50 to $100 for similar parts using traditional machining processes. This translates into the opportunity to create more design iterations and refinements, as well as low-cost multiple copies for more extensive testing.
Laser cutting essentially involves placing a flat sheet of material on an x-y axis bed and using a high-power laser to accurately cut 2-D blanks of the 2-D shaped file given to the vendor. The thickness of cut possible will depend on the material, which can include foam, wood, paper, cardboard, acrylic, and plastics, among many others. A thickness of 0.5 in. is possible in most of these materials, but check with the vendor before assuming that a specific plastic can be cut this thick. Incomplete cuts can score the surface for marking or decorative purposes. (Laser cutting of metal will be addressed later.) A bonus is that many plastics are effectively flame polished on the edges as they are cut. This can be particularly important for copying the surface qualities of molded parts (for example, hydrophobic or hydrophilic surface qualities) or maintaining optical clarity.
Laser cutting is also useful for mocking up dynamic mechanisms such as latches or hinges. This is done by creating a representative cross section through the mechanism and then making laser-cut profiles. The parts are then laid out and fitted together with pins for hinge points to observe how the mechanism will operate in reality.
In addition, laser cutting is useful for mimicking disposable plastic parts that carry fluids, and for making sheet-metal prototypes out of polycarbonate. Polycarbonate has a bending property similar to that of steel but is clear, thus allowing see-through sheet-metal mock-ups. If one decides to mimic sheet metal this way, it is essential to debug the laser scoring and bending process with the vendor. If polycarbonate is scored too deeply, it will crack, so establish appropriate bend allowances for the 2-D blanks prior to forming.
Creativity is the key to fully exploiting the laser cutting process. As an example, Bridge Design makes its prototype printed circuit boards by laser cutting a blank glass fiberbased PCB substrate (no copper cladding). It's cheap and fast. If one cuts the through-hole component patterns, components can be stuffed in to check clearances in complete product assemblies and to test switch and potentiometer elements.
Laser cutting can also be used to evaluate airflow or appearance issues of sheet-metal boxes. For example, to mock up a box in sheet metal with vents and various hole patterns, a kit of these different facets can be created out of laser-cut cardboard and then stuck together in the desired 3-D form. Actual fans can then be mounted into the assembly and airflow can be measured through good approximations of the intended sheet-metal enclosure.
There are a few important points to remember when adapting 3-D design within the 2-D limitations of laser cutting. If the parts cannot be created from a single 2-D blank, they may need to be layered. The 3-D structures can be built up by combining the first set of 2-D shapes with a second set. Rotate them at 90° with respect to the original 2-D shape for even more creative combinations, and expect to experiment quite a bit before succeeding. Obviously, there are many ways of bonding laser-cut assemblies. Double-sided tape and solvent cements are some of the better methods.
When to use this technique: Consider using laser cutting for any intricate plastic parts that can be represented as 2-D forms, or build up more-complex 3-D forms with multiple layers. The process can be used to mimic injection-molded disposables and fluidic components. It is also especially useful for creating quick breadboards of any dynamic mechanism that can be represented by clever combinations of 2-D shapes, such as gears, levers, hinges, pivots, slides, detents, and so on. Laser cutting equipment vendors like Lasercamm (Menlo Park, CA) or local model-making companies may be able to refer you to nearby service bureaus.
CNC Water Cutting of Foamed Plastic and Rubber. CNC water cutting is closely allied to laser cutting and is worth considering--especially for foam rubber materials. With water cutting, one can do complex fabrications in foam with much more precision than would be possible with manual cutting or even die-cutting. Neoprene up to 1 in. thick can be cut with great precision.
This technique is a great way of mocking up large volumes of experimental gaskets. Combining these gaskets with plastic or metal underlays produces complex prototypes that are highly cost-effective for a clinical trial or a beta test site. The costs and schedules of this process are similar to those of the laser cutting of plastic.
When to use this technique: CNC water cut any intricate 2-D shape in foamed rubber or plastic for gaskets, seals, or fabrication of disposables that need these materials. Using this technique avoids laying down expensive and time-delaying dies. Unfortunately, this is a difficult service to track down. Jet Stream Water Cutting (Hayward, CA) may be one place to start. Also try asking local foam converters if they know who has the equipment in your area.
Laser Cutting of Metals. Before deciding to laser cut metals, be aware of their limitations; metal is not as easy to laser cut as plastic or wood. Much more powerful equipment is needed, and there are longer lead times with most sheet-metal vendors. It is also important to pay attention to thermal issues. With close-packed vent patterns in thick sheet metal, considerable warping due to thermal buildup can occur. Some materials--such as copper beryllium, which is poisonous when it burns--are simply not amenable to laser cutting. However, in such instances substitute materials can be used.
To create sheet-metal models, one can make a CAD file and unfold it manually on a CAD system, adjusting for bend allowances or use. More-sophisticated CAD systems, such as the ProSheetmetal module of ProEngineer, allow unfolding of sheet-metal parts automatically and take bend allowance into account. However, for those who are not highly skilled in this area, it is advisable to create the CAD file of the desired parts in their finished 3-D state, and let the vendor accept the liability of unfolding the blanks.
As with any sheet-metal fabrication, lead times for laser cutting can vary from days to months, depending on the complexity and vendor relationship. However, expect to get flat blanks done more quickly than any parts that require bends.
When to use this technique: Consider using laser cutting on any sheet metal fabrication that would have been done using traditional CNC punching. The technique will be most competitive when the shapes required are complex and would otherwise need either complex manipulation and nibbling of the metal or custom punches (fan rings and custom connector cutouts, for example). Most larger CNC sheet-metal vendors are now using laser cutting.
About the Author(s)
You May Also Like