November 10, 2003
Originally Published MPMNNovember 2003
PROFILE
Optical Scanning Tool Performs 100% Stent Inspection
Automated system reduces potential for human error
Joyce Laird
|
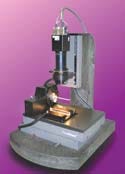
The FineScan takes a finely detailed image of the stent, any part of which can then be automatically inspected. |
It has been said that any type of quality control (QC) procedure relying on operator expertise is only 80% accurate. When the device being inspected is something as critical as a stent, however, a 20% error rate is not acceptable. A contract stent manufacturer, seeking to add value to its OEM services, found an optical inspection instrument that not only reduced the potential for human error but also substantially accelerated the QC process.
Laserage Technology Corp. (Waukegan, IL) manufactures precision tubes, including stents, connectors, and various other items for medical device OEMs. The company typically accommodates 20 to 60 individual jobs with lot sizes ranging from 50 to more than 5000 per production run. "We need to inspect as-cut stents using approved and validated procedures as required by FDA and our customers," notes business unit manager Dan Capp.
As stents decrease in size and cutting patterns become more intricate, conventional optical equipment is not always up to the task of adequately inspecting the products. Laserage had been using optical comparators, tool microscopes, and automated CNC vision systems. These tools require a high level of operator expertise. Standard automated optical systems with a camera use a stepping process to take multiple small photo segments; the engineer must write fairly complex CNC inspection routines and then piece together the images like a jigsaw puzzle to complete a full stent inspection. While this technique is acceptable for some of the larger stent diameters, it lacks the repeatable accuracy required to inspect extremely small stents or those with intricate patterns. It also is not suited for performing a 100% point inspection. Because the instrument requires considerable operator expertise, labor costs can be significant and there is potential for human error.
Sourcing speed and accuracy
In sourcing a new inspection tool, Laserage identified speed, accuracy, and fast changeover capability askey criteria. The ability to offer its customers 100% inspection of the product--performing thousands of measurements at once as opposed to having an operator look at a handful of critical points--was also an attractive proposition. The FineScan system from Visicon Inspection Technologies (Napa, CA) fulfilled these requirements.
The system comprises a high-resolution digital camera, rotating gem spindle, light source, and proprietary software bundle. Once the unit has been programmed, the inspection process is fully automatic with the exception of the loading and unloading of the stents. All inspection data are saved within the system software.
"We take a single scan and from that we look at the entire image, using pattern matching to do inspections. What used to take minutes, now takes seconds," says Dan Freifeld, president of Visicon.
How it works
The operator places the stent over a transparent mandrel. Light is projected through the stent, which is automatically rotated 360°. The camera, mounted above the mandrel assembly, takes photos of the part as it spins underneath, producing a finely detailed and perfectly registered digital image. Gauges programmed by the user tell the system software which points require inspection. The system can be programmed to perform inspection routines on a single location or the entire device pattern. The inspection data are output in a table format, which can be exported to Excel or SPC programs.
Capp concedes that learning the mechanics of the FineScan system and programming it was no walk in the park. "It's a challenge," he says. "The most critical parts are getting the lighting right, especially for very small stents with dense patterns, and teaching the program to locate the gauges," says Capp. Gauges are used by the software to find all of the image points that require inspection. The system can be programmed to perform inspection routines on one location or the entire device pattern. Once you get the software gauges set for a particular design, adds Capp, "the reproducibility and ability to measure a huge quantity of parts is excellent." While the learning curve is steep, the process is quite straightforward once the operator has been properly trained, according to Capp. "The software basically runs off standard Windows templates, so it is just a matter of learning to apply the custom interface tools."
When the programming has been completed, "it doesn't matter if the FineScan is inspecting five or 5000 points," says Capp. "Mechanically, all that the system is doing is taking a picture. The inspection gauges are applied to the picture within the software, and it all happenssimultaneously in computer processing time."
Added value
|
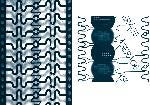
Bitmap files created using the FineScan system can be e-mailed to customers as stent design issues arise. |
Laserage has benefited from the system's speed as well as the ease with which on-the-fly changeovers can be made. Being able to offer OEMs the capability of taking thousands of measurements in less than a minute with 100% accuracy adds substantial value to the company's services, adds Capp. "One plus that I didn't expect is that I can use the digital output from the FineScan as a descriptor," says Capp. "I put images into procedures and e-mail them to customers to show them specific areas of concern in their design. I don't know of any other inspection system that can provide a detailed digital image of the entire stent surface," says Capp.
Some Laserage customers want every stent to be inspected using the FineScan. For many OEMs, however, the instrument is especially valuable as an audit device, says Capp. A representative lot of stents is thoroughly inspected on the FineScan, while the rest are subjected to a standard optical inspection. Everything receives a lot number, and the data are provided to the client for product validation.
Laserage Technology also uses the data generated by the FineScan for its own process control. "The data we get from in-process measurements are plotted on a statistical process control chart," says Capp. "This tells us if there is a trend that could be affected by our production equipment."
Laserage Technology continues to use other optical inspection equipment for less complicated jobs. "But for large orders of 5000 or 10,000 parts per month and when our customers want [complete] supporting data, we use the FineScan," says Capp. "It saves time and gives us a new service to offer our customers."
Copyright ©2003 Medical Product Manufacturing News
You May Also Like


