OEMs that rigorously manage the quality of their suppliers' products and services stand to benefit from improved supplier performance.
July 1, 2007
Originally Published MPMN July/August 2007
EXHIBITOR PROFILES
Company Measures Up to Medical Applications with Highly Accurate Encoders
|
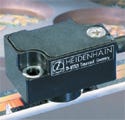
Exposed linear encoders are suitable for manufacturing applications where high accuracy is demanded. |
Heidenhain (Schaumburg, IL) has produced more than 4 million linear encoders since it manufactured its first in 1952. Today, the company supplies its experience to the medical industry with a number of linear encoders and measuring systems used for applications that demand precision and accuracy.
The company's long-standing concentration on highly accurate exposed linear encoders is suited to today's medical manufacturing landscape, says Kevin Kaufenberg, public relations manager at Heidenhain. In particular, he points to pipette dispensing machines. “There is a trend in pipette machines toward smaller hole sizes, which requires greater dispensing accuracy,” he says. “Older medical machines use bell sensors, but with the need for greater accuracy, more and more machines are incorporating exposed linear encoders.”
The company's LIP series of encoders achieve an accuracy rating of ±0.5 µm. Ranging in length from 70 to 1440 mm, they have a maximum traversing speed of 30 m/min. The encoders are designed for ultraprecision machines and high-accuracy machine tools, and can be used for medical laboratory equipment or lab automation machines such as pipette machines, or treatment machines such as CT scanners or radiation machines.
Also for the medical market, the company offers a line of length gauges. The Specto gauges are designed for process monitoring and quality control applications, such as checking dimensions on pacemakers or stents. Achieving an accuracy of ±1 µm, these incremental length gauges have measuring ranges of 12 and 30 mm. They also provide a reference mark, a feature new to the current version of the gauge series.
The mechanical design of the gauges is suitable for the requirements of in-process gauging and quality control. For example, the length gauges are designed for plunger velocities up to 1.2 m/sec. All versions feature a ball-bush guided plunger and protection against contamination. Versions for pneumatic plunger extension are available.
The reference mark is designed to result in project productivity gains, particularly in linked machines. Due to incremental scanning according to the photoelectric principle, the gauges remain stable over long periods of operation, requiring no calibration, according to the company.
Copyright ©2007 Medical Product Manufacturing News
You May Also Like


